

Solar Roof Hooks: Types, Applications, and Installation Guide(2026)

Last Updated: October 26th, 2026
Author: Devi Huang | International Sales Team, ALV(E-mail address:sales@xmalv.com)
Devi Huang is part of the international sales team at ALV, a manufacturer of solar mounting systems and aluminum profiles. She works with EPC contractors, distributors, and project developers worldwide, helping customers choose the right mounting solutions based on project requirements, local standards, and budget.
What Are Solar Roof Hooks?
Solar roof hooks are mechanical mounting components used primarily on pitched roofs covered with clay tiles, concrete tiles, slate, or similar roofing materials.
A typical roof hook is fixed to a structural member, such as a timber rafter, using approved fasteners. Its upper section passes through or around the roof-tile covering and connects to a mounting rail that supports the solar panels.
Unlike the tile itself, the underlying structural member provides the primary anchorage. The complete load path must be verified from the mounting rail and hook through the fasteners and roof structure.
A typical tile-roof solar mounting assembly includes:
- Solar roof hook: Connects the mounting rail to the roof structure.
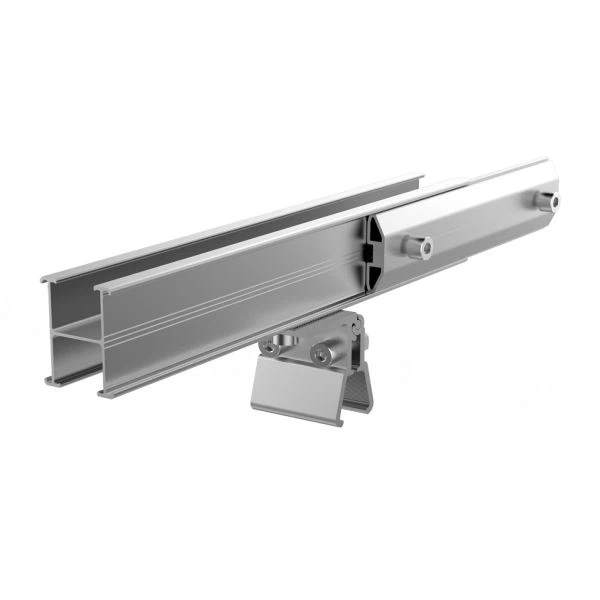
- Mounting rail: Supports and positions the PV modules.
- Fasteners: Secure the hook and rail connections.
- Roof tiles: Provide the weather-facing roof covering.
- Flashing or waterproofing components: Help maintain the roof’s weather resistance where required.
According to the National Renewable Energy Laboratory (NREL), roof-penetrating solar attachments require appropriate flashing and sealing to prevent water intrusion. The attachment must also provide sufficient penetration into the supporting structure for the specified design loads.
Why Are Solar Roof Hooks Important?
The performance of a rooftop PV system depends not only on the solar modules but also on the quality and compatibility of its mounting components.
1. Reliable structural attachment
A properly designed roof hook transfers loads from the mounting rails into the roof structure. The attachment must be selected and installed to resist applicable wind uplift, downward loads, and other project-specific forces.
2. Protection of roof integrity
A suitable hook profile can fit around the roof covering without placing excessive pressure on the tiles. Correct flashing, sealing, and installation details are essential wherever the roof membrane or underlayment is penetrated.
3. Installation efficiency
Roof hooks designed for specific tile profiles can reduce unnecessary adjustments, tile cutting, and installation rework. Adjustable models may provide additional flexibility when tile geometry or rail alignment varies.
4. Long-term durability
Material selection, corrosion resistance, fastener compatibility, and drainage details all influence the service life of a mounting assembly. These factors are especially important in coastal, humid, and industrial environments.
Types of Solar Roof Hooks
Different roof coverings require different hook geometries. The following categories are common options for tile-roof PV mounting systems, although the exact product design and compatibility must be confirmed for each project.
1. Curved Tile Roof Hooks
Curved tile hooks are designed for profiled roofing materials such as many clay, Spanish, and Roman-style tiles.
Their shape allows the hook arm to pass through the tile covering while providing a connection point for the mounting rail. Some models offer adjustable height or positioning to accommodate variations in tile profiles.
Typical applications:
Residential roofs with curved clay tiles
Buildings with Spanish-style roofing
Selected commercial buildings with profiled tile coverings
Selection considerations:
- Tile height and curvature
- Clearance between the hook and surrounding tiles
- Rafter position and width
- Required rail height and alignment
The hook must not force the tile upward or create concentrated pressure that could cause cracking.
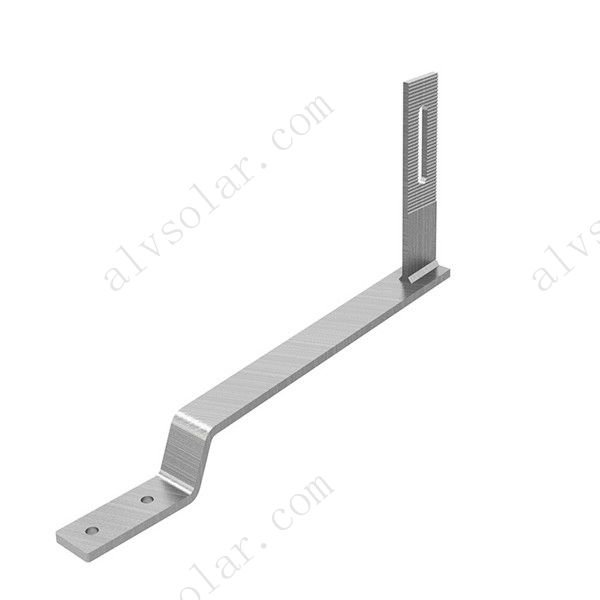
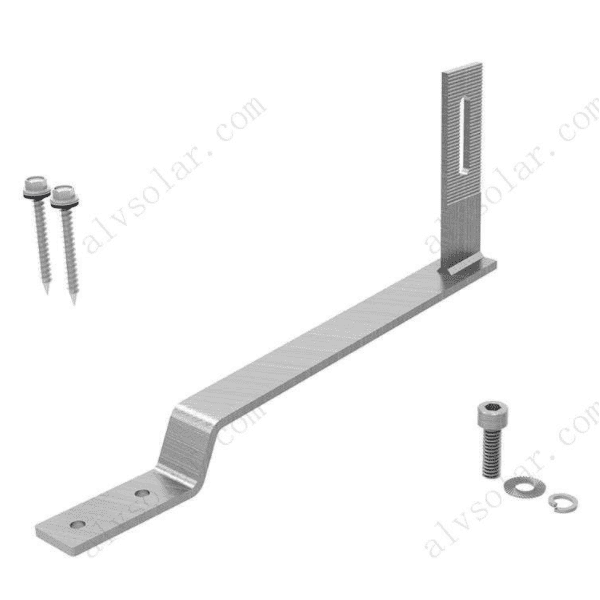
2. Flat Tile Roof Hooks
Flat tile hooks are designed for relatively flat or low-profile concrete and clay tiles. Their base and hook geometry must accommodate the tile thickness and the clearance required for the mounting rail.
Typical applications:
- Flat concrete tile roofs
- Low-profile clay tile roofs
- Selected interlocking tile systems
Advantages:
- A compact mounting arrangement
- Compatibility with suitable low-profile tile geometries
- Potentially reduced tile modification when the correct hook is selected
Before installation, verify that the hook can be fitted without loading the tile improperly and that the rail connection remains accessible.
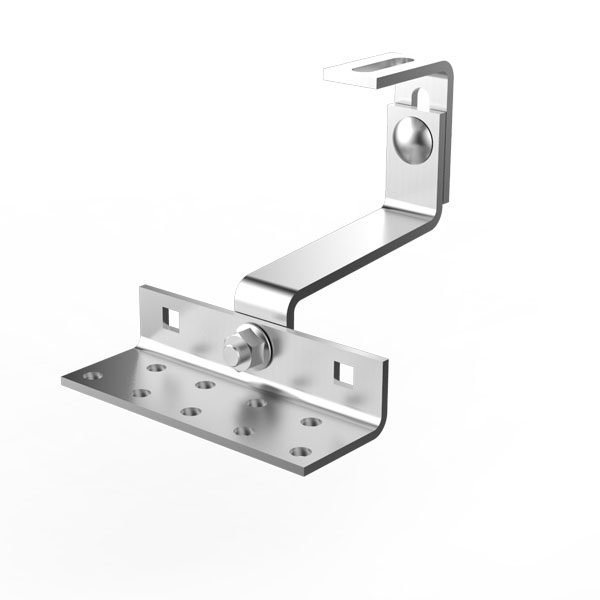
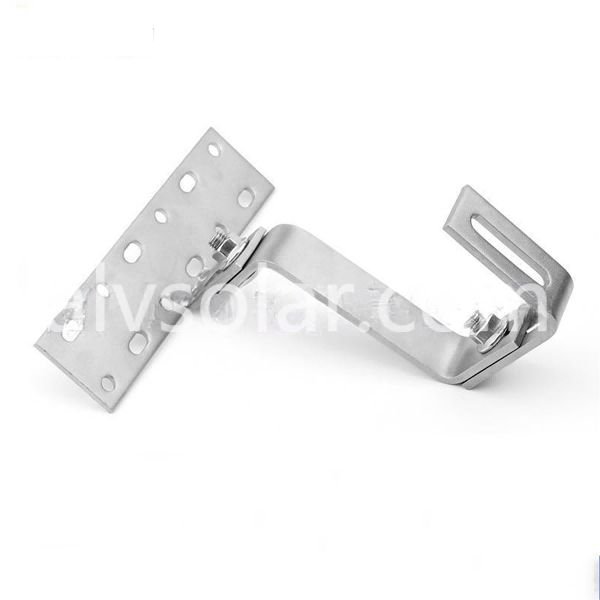
3. Adjustable Solar Roof Hooks
Adjustable roof hooks include features that allow changes to height, lateral position, or the angle of the rail connection, depending on the product design.
They can be useful when tile profiles vary or when the mounting rail must be aligned despite differences in the underlying roof geometry.
Typical applications:
- Roofs with variable tile thicknesses
- Renovation projects
- Installations requiring additional mounting flexibility
Advantages:
- More installation flexibility
- Easier rail alignment in suitable applications
- Potentially less rework on irregular roof surfaces
However, adjustment ranges are limited by the product design. Adjustability does not eliminate the need to verify structural capacity, fastener placement, and tile clearance.
4. Slate Roof Hooks
Slate roof hooks are intended for suitable natural or synthetic slate roofing systems. Depending on the design, installation may require lifting or removing individual slates and integrating the attachment with the roof’s weatherproofing layers.
Typical applications:
- Residential slate roofs
- Renovation projects
- Buildings with architectural roofing requirements
Key considerations:
- Slate thickness and fragility
- Underlayment and flashing details
- Available structural fixing locations
- Compatibility with the specified mounting rail
Slate can be brittle, so the hook and installation method must be selected to minimize damage to surrounding roofing materials.
5. Low-Profile and Specialized Roof Hooks
Some projects require low-profile hooks, extended hooks, or specially shaped mounting brackets to accommodate unusual tile geometries or specific rail heights.
These products should be selected based on actual roof measurements, attachment requirements, and the manufacturer’s installation instructions rather than appearance alone.
For roofs that use standing-seam or trapezoidal metal sheets, dedicated metal-roof clamps or brackets are generally more appropriate than conventional tile roof hooks. The correct solution depends on the roof construction and approved attachment method.
Solar Roof Hook Types Compared
| Hook type | Typical roof | Main selection factor |
| Curved tile hook | Clay or Spanish-style tiles | Tile curvature and height |
| Flat tile hook | Flat concrete or clay tiles | Tile thickness and clearance |
| Adjustable hook | Compatible tile roofs | Adjustment range and rail alignment |
| Slate hook | Natural or synthetic slate | Slate thickness and waterproofing |
| Specialized hook | Unusual tile profiles | Verified geometry and structural design |
No single hook is suitable for every tile roof. Always confirm compatibility with the actual roofing material, supporting structure, mounting rail, and project design loads.
Materials Used in Solar Roof Hooks
Material selection influences corrosion resistance, mechanical performance, and the suitability of a mounting component for its installation environment.
Stainless Steel
Stainless steel is widely used for tile-roof hooks because it can provide good corrosion resistance and mechanical strength.
Common grades include:
- AISI 304 stainless steel: Used in many general outdoor applications where its corrosion resistance is appropriate.
- AISI 316 stainless steel: Often considered for more demanding corrosive environments, including some coastal installations.
The correct grade depends on exposure conditions, environmental contaminants, crevice risks, and the expected service life. Grade 316 is not automatically immune to corrosion in every marine environment.
Aluminum Alloy
Aluminum alloy is widely used in PV mounting rails and selected bracket designs because of its low weight and good corrosion resistance.
When considering aluminum components, verify the alloy, temper, cross-sectional design, connection details, and compatibility with adjacent metals.
Galvanized Steel
Galvanized steel can be suitable for certain mounting components where the coating system and component design meet the project’s corrosion and structural requirements.
The protection provided depends on coating type, thickness, edge coverage, exposure conditions, and maintenance.
Material Selection Comparison
| Material | Potential strengths | Important checks |
| Stainless steel | Corrosion resistance and strength | Grade, finish, exposure conditions |
| Aluminum alloy | Low weight and corrosion resistance | Alloy, temper, section design, connections |
| Galvanized steel | Protective zinc coating and structural versatility | Coating specification, cut edges, corrosion exposure |
Important: Avoid selecting materials based on price or nominal strength alone. The complete assembly—including hooks, fasteners, rails, washers, and other interfaces—must be suitable for the intended environment.
How to Choose the Right Solar Roof Hook
Selecting the correct roof hook involves more than matching the hook to the tile shape. Use the following checklist during project planning.
1. Identify the Roof Tile Profile
Determine whether the roof uses curved clay tiles, flat concrete tiles, slate, or another covering.
Record the tile dimensions, thickness, profile height, and overlap arrangement. Clear photographs and measurements help a supplier recommend a compatible product.
2. Confirm the Supporting Structure
Identify the location and dimensions of the rafters or other approved structural members.
The hook must be attached to the intended load-bearing structure, not simply to the tile or an unsupported roof covering. Confirm the fastener type, embedment, edge distances, and substrate condition.
3. Check Wind and Snow Loads
Wind uplift and snow loads can significantly influence attachment requirements.
The structural designer should determine the applicable loads using the local building code and relevant standards. Depending on the market, references may include ASCE/SEI 7 in the United States or the applicable Eurocodes and national annexes in Europe.
Do not assume that a standard hook spacing is suitable for every roof. Attachment spacing and fastener specifications must follow the verified project design.
4. Evaluate Waterproofing Requirements
Determine how the attachment interacts with the tile, underlayment, roof membrane, and any required flashing.
A hook that fits the tile profile is not necessarily waterproof by itself. Use the specified flashing and sealing method, and coordinate with the roofing manufacturer or a qualified roofing professional where necessary.
5. Verify Rail Compatibility
Check the rail profile, clamp or bolt interface, slot dimensions, and required adjustment range.
A hook and rail should form a compatible assembly, with fasteners and tightening requirements specified by the system manufacturer.
6. Consider the Installation Environment
Coastal salt exposure, industrial pollution, humidity, and other site conditions may affect material and coating selection.
For projects in corrosive environments, review the material grades and the compatibility of dissimilar metals to reduce galvanic corrosion risks.
7. Review Installation and Maintenance Requirements
Consider access, tile replacement, inspection requirements, and the availability of replacement components.
For commercial installations, consistent component specifications and clear installation documentation can help reduce errors across large arrays.
Solar Roof Hook Installation Guide: Step by Step
The following steps describe a general installation sequence for a typical tile-roof hook system. They are not a substitute for the instructions supplied with a specific mounting product.
Step 1: Inspect the Roof
Before work begins, assess the condition of the tiles, underlayment, rafters, and other relevant structural elements.
Confirm that the roof is suitable for the proposed PV system and that its remaining service life is appropriate for the project. Repair or replace damaged roofing components before installing the mounting system.
Establish safe roof access, fall protection, and an installation work plan.
Step 2: Mark the Hook Positions
Use the approved mounting layout to identify each hook location.
Locate the supporting rafters or structural members and confirm their centerlines. Check that the proposed hook positions meet the specified attachment spacing, rail layout, and edge-distance requirements.
Do not rely on tile positions alone to determine the location of structural supports.
Step 3: Lift or Remove the Relevant Tiles
Carefully lift or remove the tiles around the marked attachment points, following the roofing system’s handling requirements.
Protect the tiles from impact and avoid damaging the underlayment. Brittle, cracked, or deteriorated tiles should be replaced rather than forced back into position.
Step 4: Position and Fasten the Roof Hook
Place the hook base in the approved position over the structural member.
Where required, drill pilot holes using the size and depth specified for the substrate and fasteners. Install the specified fasteners to the manufacturer’s requirements.
Confirm that the hook is securely fixed and that the installation does not introduce prohibited edge distances, unsupported fasteners, or interference with the roofing assembly.
Step 5: Check Tile Clearance and Waterproofing
Carefully reposition the tiles around the installed hook.
The tiles should sit correctly without being lifted, pinched, or subjected to excessive point loading. If the hook interferes with a tile, stop and correct the installation using an approved adjustment or tile-modification method.
Install the specified flashing, sealing, or waterproofing components wherever required by the product design and roof construction.
Step 6: Install and Align the Mounting Rails
Attach the mounting rails using the specified bolts, washers, and connection hardware.
Align the rails according to the approved layout. Verify rail straightness, spacing, cantilever limits, and connection details.
Tighten the fasteners to the torque values specified by the manufacturer. Do not assume that one torque value applies to every hook, bolt, or rail interface.
Step 7: Install the Solar Modules
Install and clamp the PV modules according to the mounting system and module manufacturers’ instructions.
Verify clamp positioning, module clearances, grounding and bonding provisions, and any requirements relating to cable management.
Step 8: Complete Quality Checks
Before handover, inspect the completed mounting assembly.
The inspection should confirm:
- Correct hook locations and attachment to structural members
- Proper fastener installation
- Adequate clearance between hooks and tiles
- Correct flashing and waterproofing details
- Rail alignment and module clamping
- Compliance with the approved structural design
- Completion of required electrical bonding and safety checks
Record relevant inspection results and address any defects before commissioning.
For an example of product-specific procedures, see the Tesla Solar Tile Hook Installation Guide. Its steps and dimensions apply to the specified product and must not be treated as universal requirements.
Common Solar Roof Hook Installation Mistakes
Even a high-quality roof hook can perform poorly if it is incorrectly selected or installed.
Fixing the Hook to the Tile Instead of the Structure
Roof tiles are generally a weather covering, not the primary structural anchorage for a conventional tile-hook system.
How to avoid it: Confirm the location of the approved structural fixing member before drilling or fastening.
Allowing the Hook to Press Against the Tile
Excessive contact can cause cracking or create concentrated loads that may damage the roof covering.
How to avoid it: Check the hook geometry and tile clearance before completing the installation.
Using Inadequate Waterproofing
Incorrect flashing, missed penetrations, or incompatible sealants can lead to water intrusion.
How to avoid it: Follow the specified waterproofing details and inspect every relevant attachment location.
Ignoring Wind Uplift and Snow Loads
A hook that fits the roof may still be unsuitable for the required design loads.
How to avoid it: Use project-specific structural calculations and approved attachment specifications.
Mixing Incompatible Materials
Unsuitable combinations of metals, coatings, and fasteners can accelerate corrosion.
How to avoid it: Confirm material compatibility and the manufacturer’s approved hardware combinations.
Overlooking Installation Instructions
Different hook models may have different fasteners, torque values, adjustment limits, and flashing requirements.
How to avoid it: Use the exact installation manual and drawings for the selected product.
Are Solar Roof Hooks Suitable for Every Roof?
No. Solar roof hooks are mainly associated with compatible pitched tile-roof applications. Other roof constructions may require different mounting technologies.
| Roof type | Common mounting approach | Key consideration |
| Curved tile roof | Profile-matched tile hooks | Curvature and tile clearance |
| Flat tile roof | Flat or adjustable tile hooks | Thickness and fixing geometry |
| Slate roof | Slate-compatible hooks or flashed attachments | Fragility and waterproofing |
| Standing-seam metal roof | Seam clamps approved for the roof profile | Seam compatibility and clamp capacity |
| Trapezoidal metal roof | Profile-specific brackets or fastened mounts | Sheet profile and structural support |
| Concrete flat roof | Engineered ballasted or mechanically fixed system | Wind loads, drainage, and structural capacity |
For metal roofs, a compatible clamp may avoid drilling through the roof sheet, but only if the roof profile, clamp design, and project requirements permit it. For tile roofs, hooks commonly require structural fasteners and appropriate waterproofing details.
The mounting solution should be selected for the actual roof—not simply for the solar module.
Solar Roof Hooks: Frequently Asked Questions
1. What are solar roof hooks used for?
Solar roof hooks connect mounting rails to the supporting structure beneath a compatible tile roof. They provide an attachment point for the PV mounting system while allowing the roof covering to remain in place around the hook.
2. Are solar roof hooks compatible with all tile roofs?
No. Hook geometry, mounting height, fastener position, and available clearance vary between tile profiles. Confirm the tile dimensions and roof construction before selecting a model.
3. Which material is best for solar roof hooks?
Stainless steel is a common choice for tile-roof hooks because of its mechanical properties and corrosion resistance. Aluminum alloy and galvanized steel may also be appropriate for particular mounting designs. The best option depends on the component design, environmental exposure, structural requirements, and compatible hardware.
4. Do solar roof hooks cause roof leaks?
A properly designed and installed system should include appropriate waterproofing measures. However, roof penetrations can leak if the attachment, flashing, or sealing is incorrectly designed or installed. Follow the approved installation details and roofing requirements.
5. How many solar roof hooks are required per solar panel?
There is no universal number. The required number and spacing depend on the mounting layout, rail span, module arrangement, roof structure, wind and snow loads, and the tested or calculated capacity of the attachment assembly.
A qualified designer should establish the layout for each project.
6. Can solar roof hooks be used on metal roofs?
Conventional tile roof hooks are not generally the default solution for standing-seam or trapezoidal metal roofs. These applications usually require compatible seam clamps or profile-specific metal-roof mounting brackets.
7. Are adjustable solar roof hooks better than fixed hooks?
Adjustable hooks offer more flexibility when the tile profile or required rail height varies. Fixed hooks may be simpler for consistent roof geometries. Neither type is automatically better; the choice depends on fit, structural performance, installation requirements, and cost.
8. What information is needed to request a solar roof hook quotation?
For an accurate product recommendation and quotation, prepare the following information where available:
- Roof tile type and profile dimensions
- Roof structure and rafter spacing
- Project location and applicable wind and snow loads
- Required mounting rail profile and connection type
- Estimated quantity and project schedule
- Required material grade and corrosion protection
- Drawings, photographs, and any applicable certification requirements
Providing these details helps a PV mounting supplier assess compatibility and avoid unnecessary quotation revisions.
Conclusion: Choose the Right Solar Roof Hook for a Reliable PV Mounting System
Solar roof hooks play an important role in connecting rooftop PV mounting rails to the underlying roof structure. The right selection depends on tile geometry, structural attachment, waterproofing, material compatibility, environmental exposure, and project-specific design loads.
For solar installers, EPC contractors, and mounting-system distributors, a reliable solution begins with accurate roof information and a compatible, properly engineered mounting assembly.
Looking for a suitable solar roof mounting solution for your next project? ALV provides PV mounting solutions for different rooftop and ground-mounted applications. Contact the ALV team with your roof details, project drawings, and quantity requirements to discuss a suitable mounting configuration.
Visit ALV Solarto learn more about our photovoltaic mounting solutions or contact our sales team to discuss your project.
Solar Roof Hooks:
Types, Applications, and Installation Guide(2026)
(E-mail address:sales@xmalv.com)